Ilford CAP-40 Modification
Here I describe how to modify an Ilford CAP-40 Cibachrome processor for RA-4 or Black and White processing
Introduction
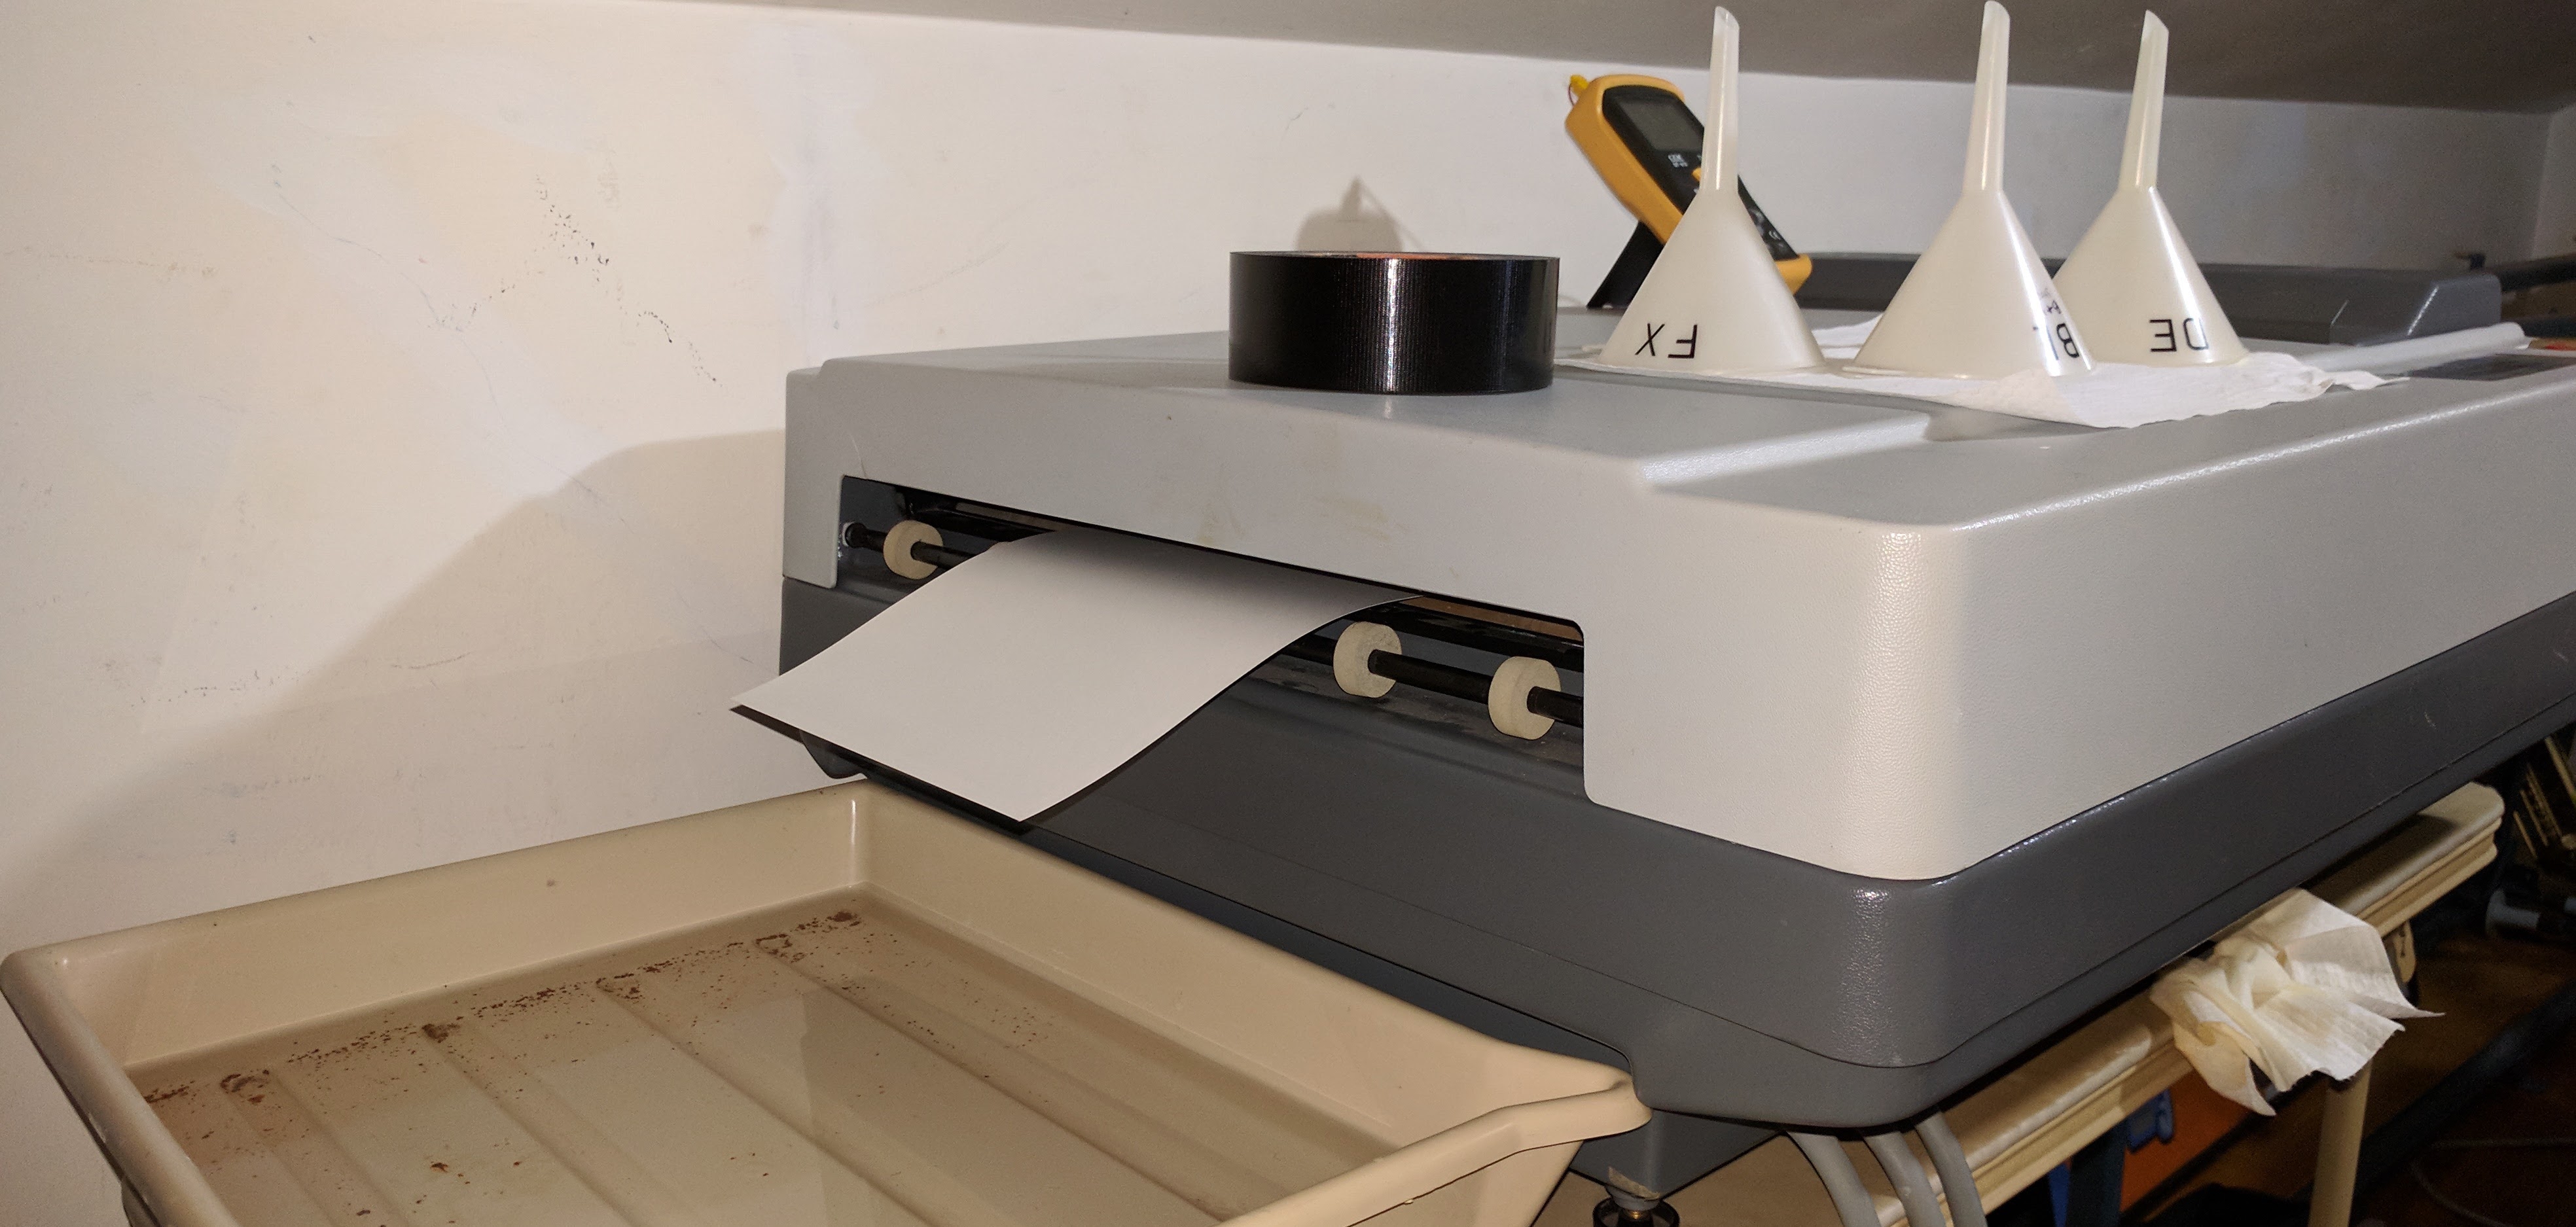
I recently acquired a well-maintained Ilford CAP-40 print processor, at a very nice price. These machines were built for the now defunct Ilford Cibachrome color printing process. Basically, you put your chemicals in the machine, turn it on, feed your exposed paper into one side, and a few minutes later, your fully processed print pops out the other side ready to be washed.
They are a roller-transport, three-tank (2L per tank) processor with an adjustable, built-in heater (up to about 110°F). The 16” wide input paper feed has a light-tight cover, so once you put your paper in, and close the door, you can turn the room lights on without fogging your print. This machine is a wonderful time-saver, and is great for consistency, as it runs every print through with the same time, agitation, and temperature.
Why modify it?
The CAP-40 was built for the Cibachrome process, which dictated 2 minute-per-bath times, at 86°F. This gives a total process time (paper in - print out) of at least 8 minutes, which felt way too long. Changing a gear and a belt will speed the machine up to ~45 seconds per bath, giving a total minimum process time of 3 minutes (really depends on the paper size). The stock machine does not have a way to change the speed of the rollers without modification.
Upping the temperature to 95°F, with a 45 sec. per tank speed allows you to run both RA-4 color process AND black and white process in the same machine, just by cleaning the machine between processes.
What do I need?
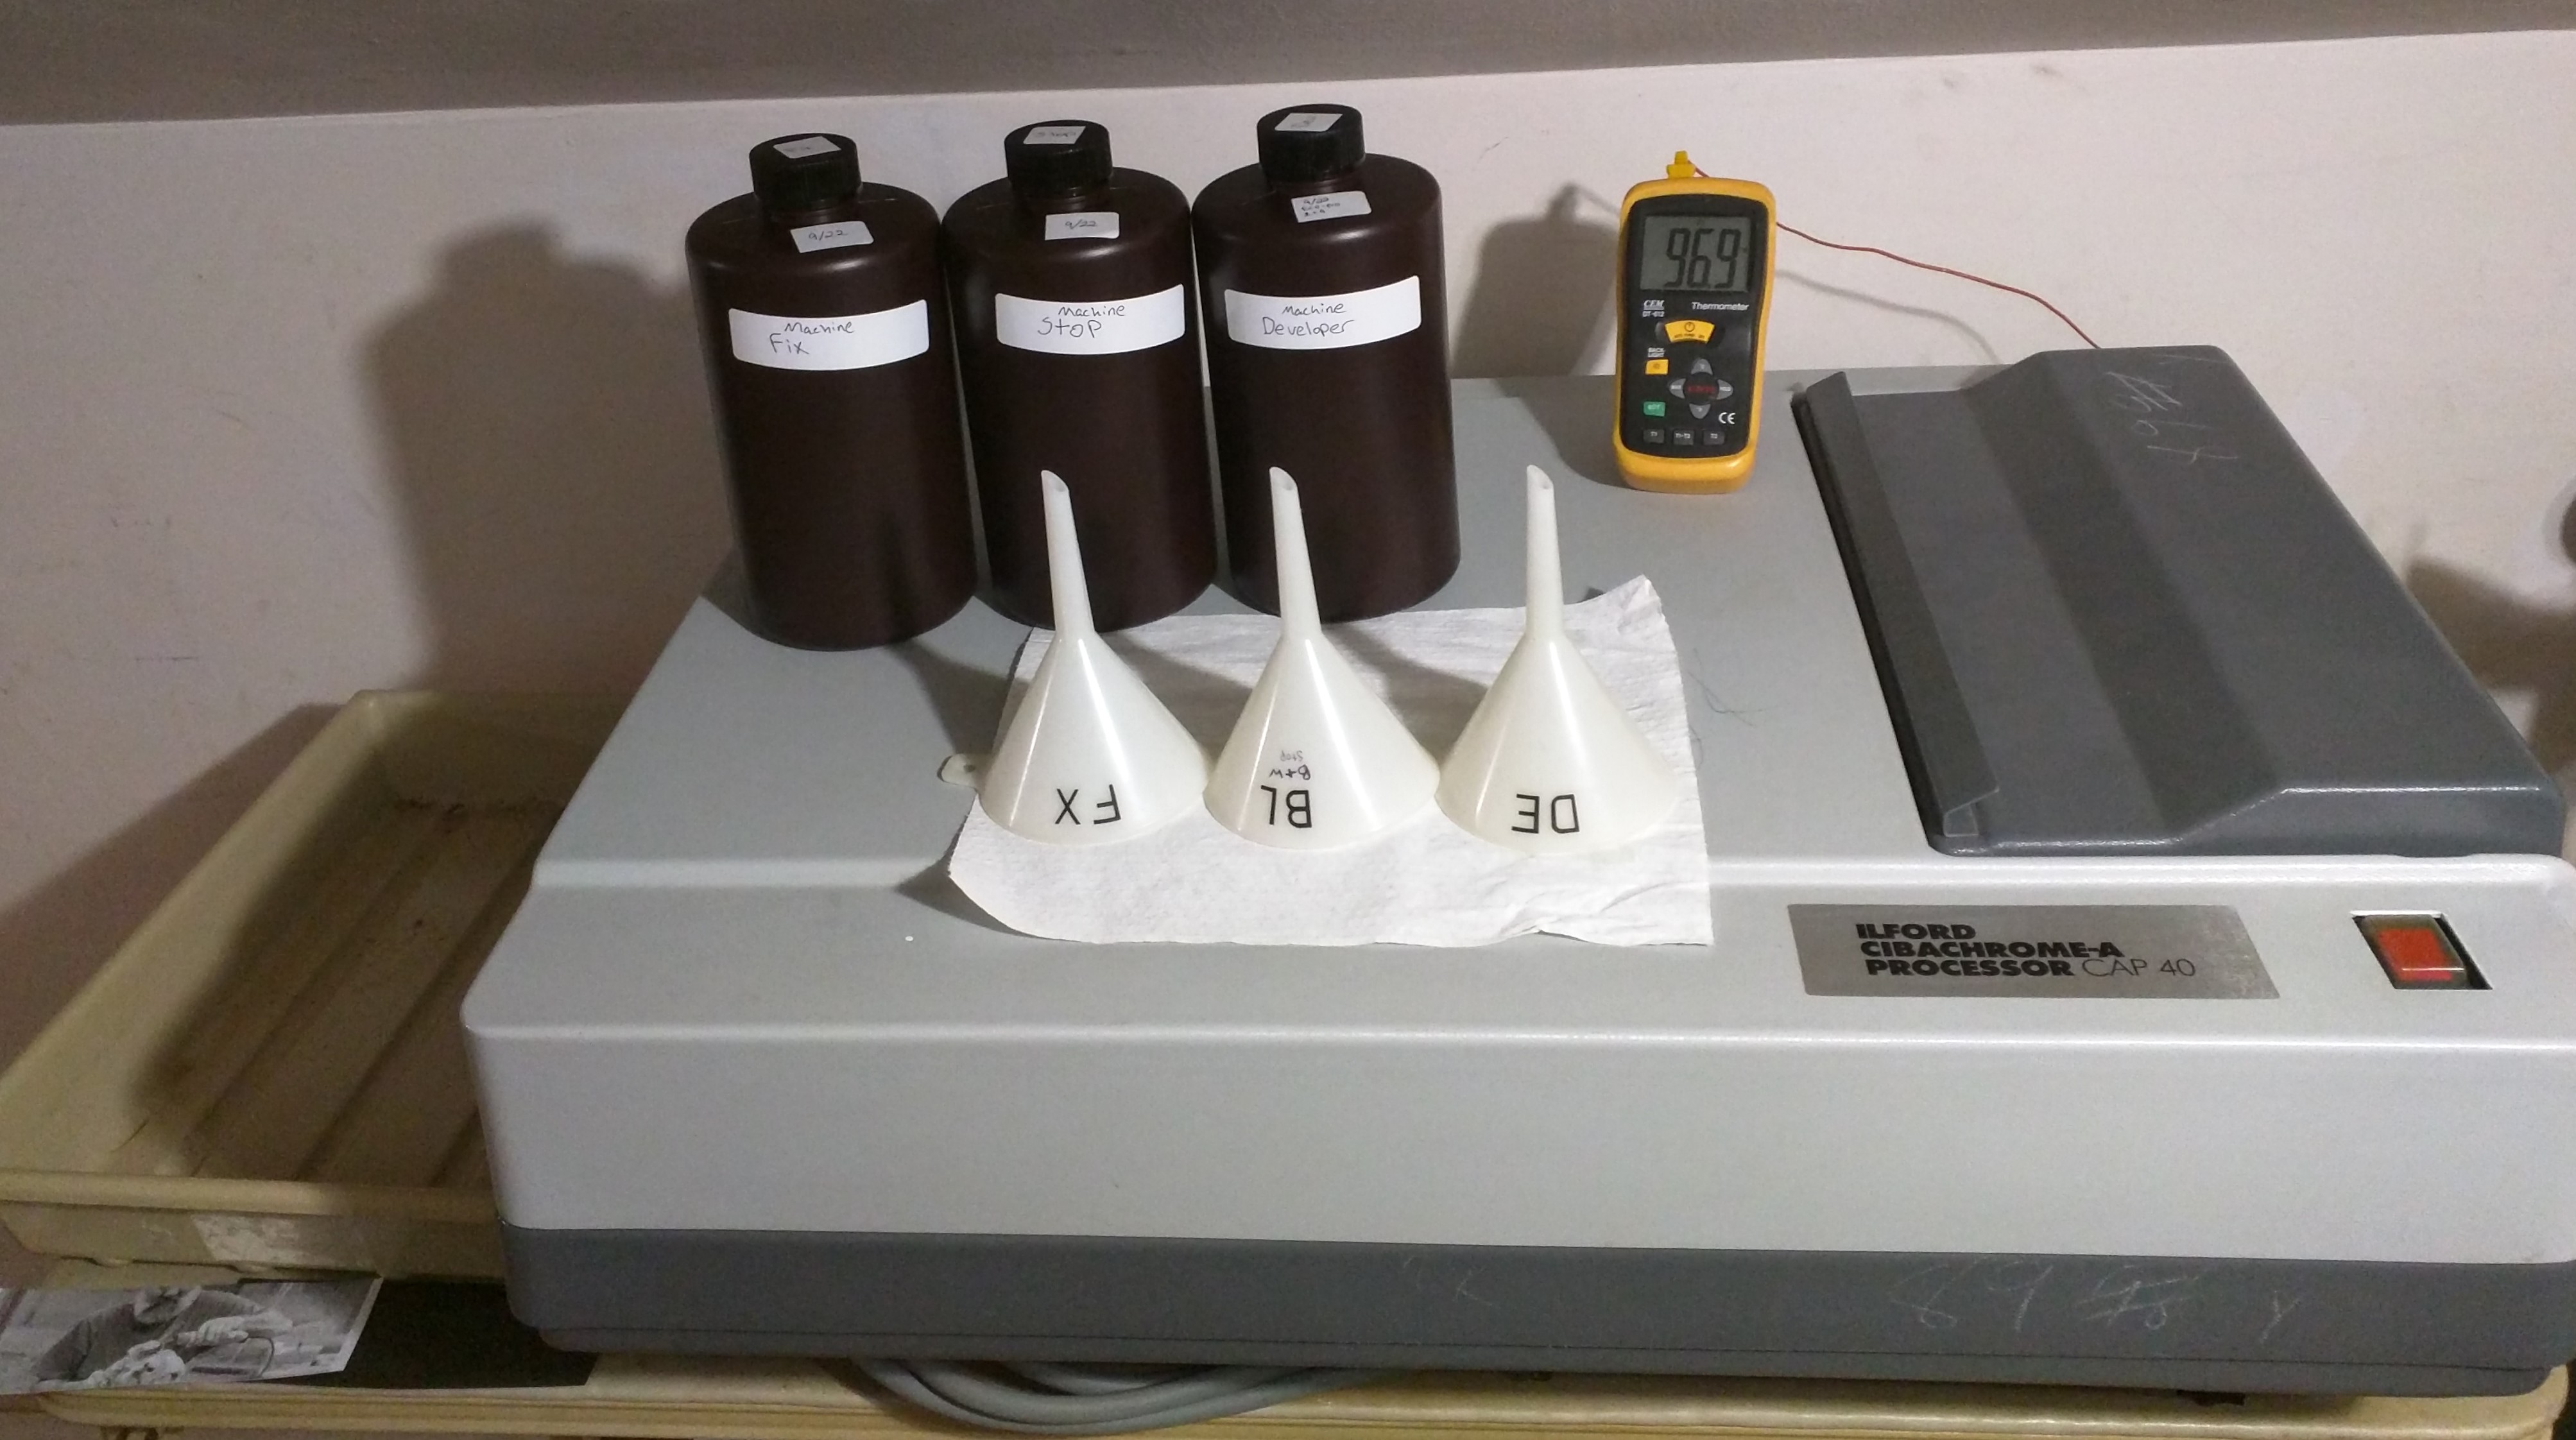
- 39 Tooth, 0.313” bore, XL Pulley for 0.375” belt
- 55 Tooth, 0.375” wide XL Belt
- Two 0.25in thick spacers, with a 0.25in hole in the center (I used sections of 0.25in PVC pipe. Stacked washers should work as well)
- Philips head screwdriver
Here we go!
Once you have everything, you will want to remove the top cover, then remove the rollers. Make sure the unit is drained, then flip the machine over. There are four screws on the bottom (one in each corner) that you will need to remove. Once the screws are out, you should be able to carefully lift the bottom of the case straight up, then move it to the side, out of the way, being careful of the hoses and fan wiring.
Towards the front of the unit, you will find the motor, gearbox, and drive pulley. These are connected to the driven pulley and driveshaft through the belt. Loosen the nut that mounts the gearbox to the motor mount, rotate the mount towards the front of the unit and remove the belt. Now you should be able to remove both nuts holding the gearbox to the motor mount and remove the motor and gearbox.
Now, remove the two phillips head screws attaching the motor mount to the top-case and remove the motor mount. Next, put the screws through the holes in the mount, slide your spacers over the screws, and re-install the mount with the spacers between it and the plastic case. This shifts the mount to make room for the larger gear we are going to install.
Put the new belt around the driven pulley and drive shaft now, since it is a LOT easier at this point.
Use an allen wrench to loosen the set screw on the drive pulley, and remove the pulley from the gearbox. Slide the new pulley on, with the hub facing the gearbox, and tighten the set screw just enough so the pulley wont slide off of the flat on the shaft. Don’t tighten it all the way until it is aligned and the belt is installed.
Re-install the gearbox and motor onto the motor mount, tightening the bottom nut, but leaving the adjustment nut loose. Fit the belt around both pulleys, move the gearbox to tighten the belt, and tighten the adjustment nut on the motor mount. Next, spin the pulleys to make sure they are both aligned and the belt doesn’t try to “jump” off of either pulley. If they aren’t aligned, this can cause the belt to wear very quickly, so move the pulley back and forth until it is aligned, then tighten the drive pulley down.
Finishing up
At this point, you are pretty much good to go. While you have the machine open, it’s a good idea to check it over. Here’s some things to look for: * Dry, cracked, leaking, or broken hoses * Broken hose clamps (I replaced several with zip-ties) * Broken, exposed, or bad wiring * Grease the worm gears on the driveshaft (I used white lithium grease, since it was what I had on hand)
Once you are satisfied that your machine wont leak, jam up, shock you, or catch on fire, put the bottom cover back on, install the screws, and flip it back over. If it hasn’t been run in a while, it would be best to give it a good clean before doing anything else with it. Fill each tank with 2 liters of clean water, then plug it in and turn it on. It should pump water up over the plates on all three tanks with a nice, even flow. The driveshafts should all also be spinning. Let that run for about 30 minutes and the water should also be nice and warm. Turn the machine off, then drain the tanks.
** DO NOT RUN THE MACHINE EMPTY** The pumps are NOT made to run dry, and doing so WILL cause them to fail very quickly!
Setting the temperature
You will want to raise the temperature on the processor to about 95°F for either black and white, or RA-4 color. This is pretty simple to do and all it requires is a thermometer and a small, flat-head screwdriver.
With the cover off and the machine filled with water or your chosen chemistry (All three tanks!), locate the small round cap to the left of the power switch, pop it off, and turn the machine on. Let it warm up (about 10 minutes after the red light in the switch turns off) then measure the temperature of the liquid in the first bath. There is a small screw adjustment next to the power switch which adjusts the thermostat. Turn it clockwise to raise the temperature, and counter-clockwise to lower it. You will want to make an adjustment, then wait until the thermometer stabilizes before making your next adjustment. Mine stabilizes fairly quickly (about 2 minutes for small changes). Once set to the new temperature, you can replace the cap and turn the machine off.
Pros:
- Easy to run
- Consistent time, temperature, and agitation
- Can’t over-agitate and slop chemistry out of the tray all over your work surface
- Fast Processing
- Light-tight once the door is closed
- Chemistry lasts longer
- Up to 16x20” prints
- Takes up less space than 3 16x20 trays
Cons:
- Loud
- Big
- Takes up more space than 3 8x10 trays
- Can’t process anything smaller than 7” on the long side
- Needs large initial batch of chemistry (though it saves it over the long run with replenishment)
Share this post
Twitter
Google+
Facebook
Reddit
LinkedIn
StumbleUpon
Pinterest
Email